Home
>
All Guides
>
How to Request your Data from Instagram
📄 How to Request your Data from Instagram

This is a simple step-by-step guide on how to request your data from Instagram. This process allows you to download a copy of your account info.
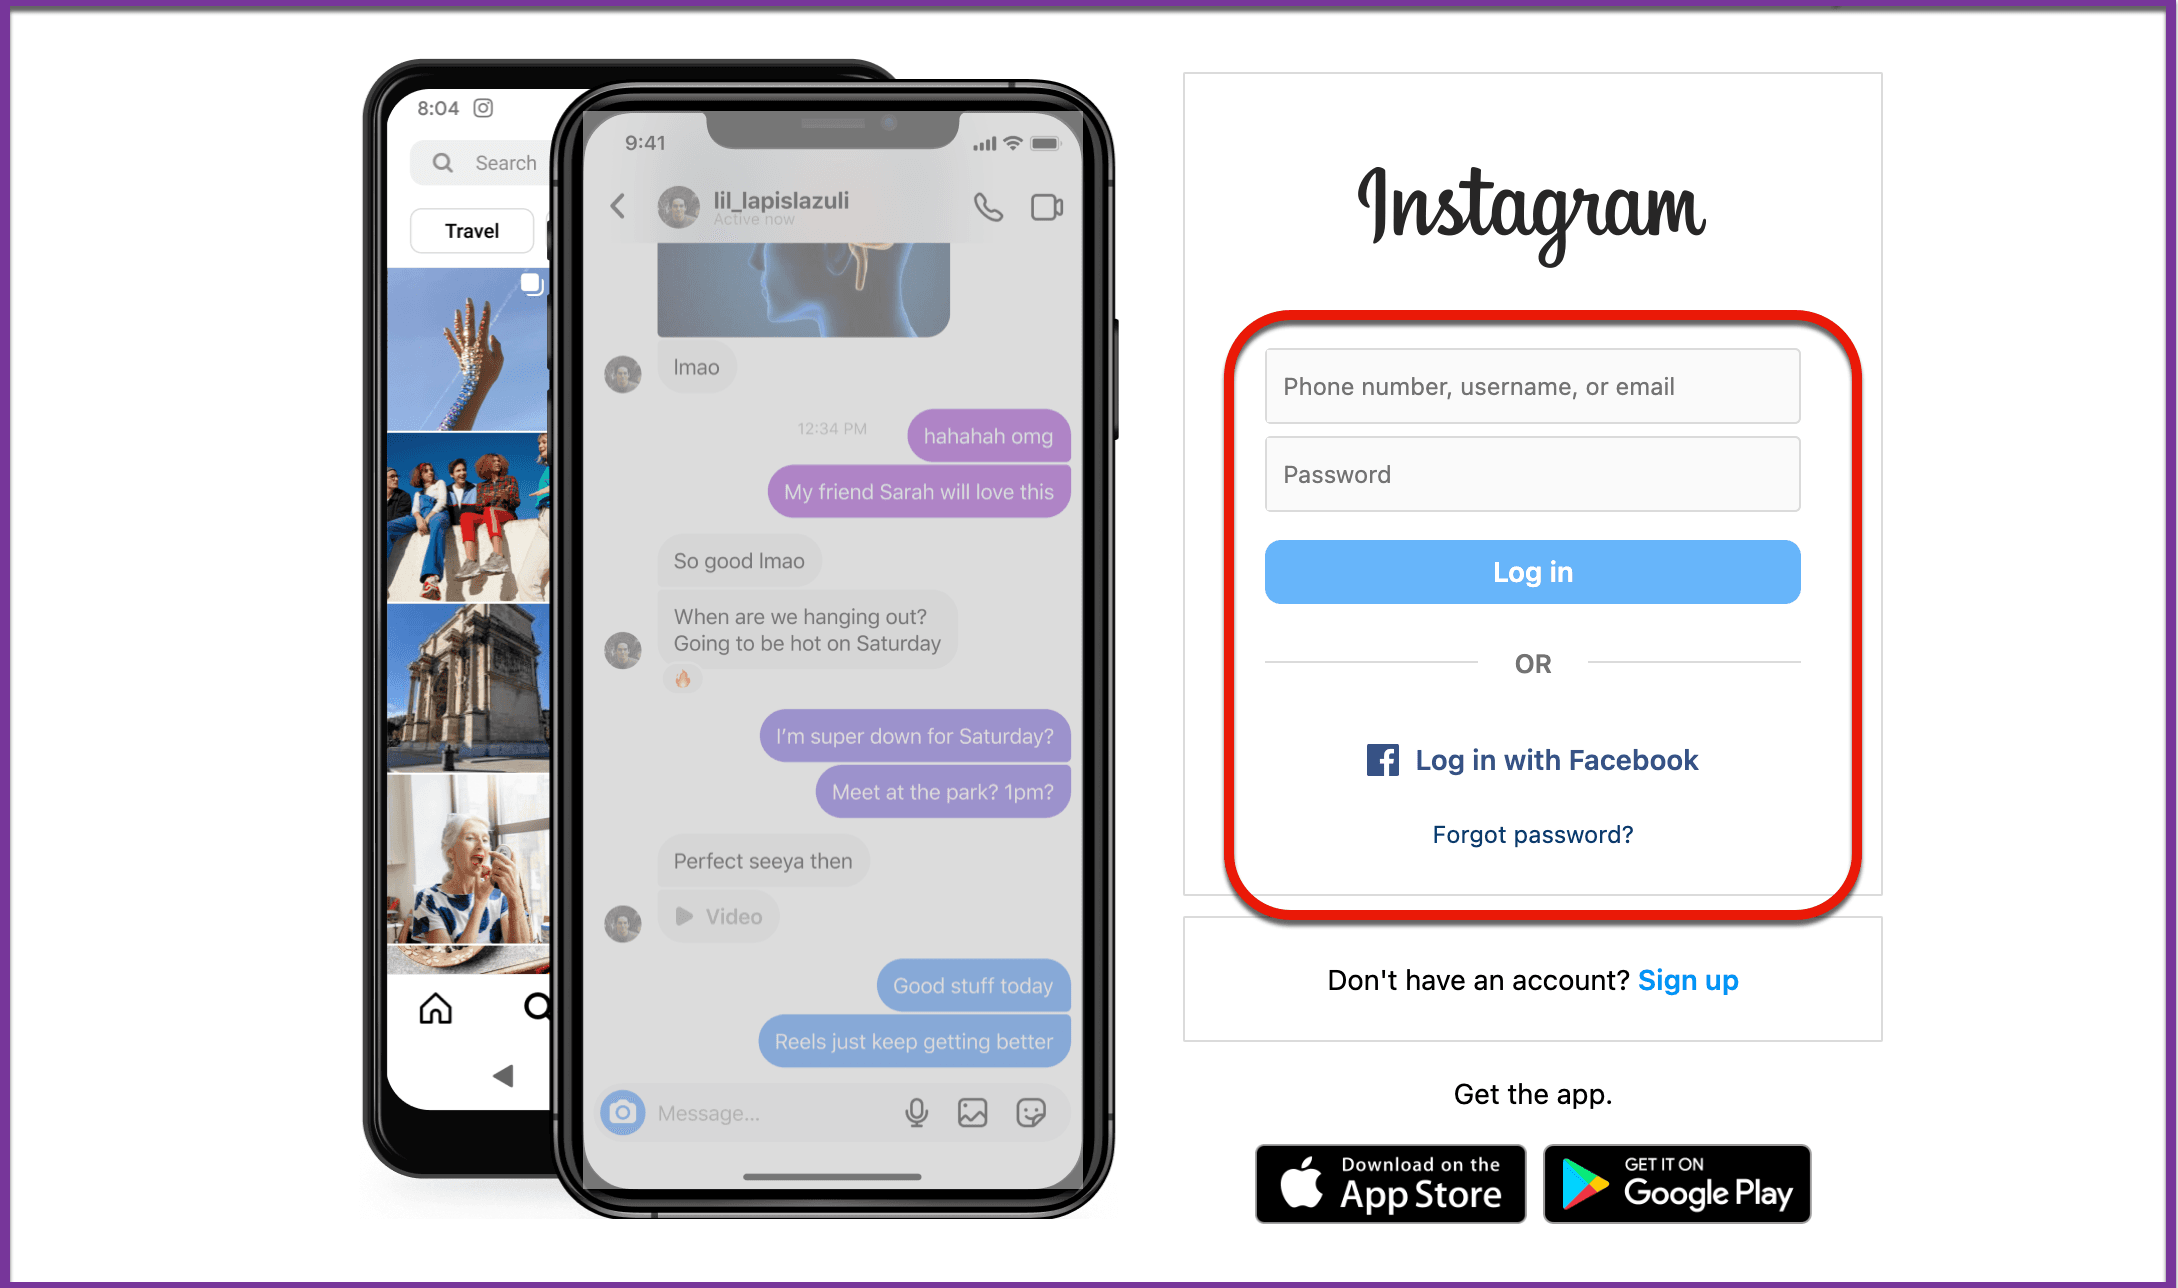
Step 1: Open Instagram
- Open the Instagram app on your device, or go to instagram.com on your desktop.
- Log in to your account if you’re not already logged in.
Step 2: Go to Your Profile
- On the mobile app, tap on your profile picture at the bottom right to open your profile page, then go into Accounts Center.
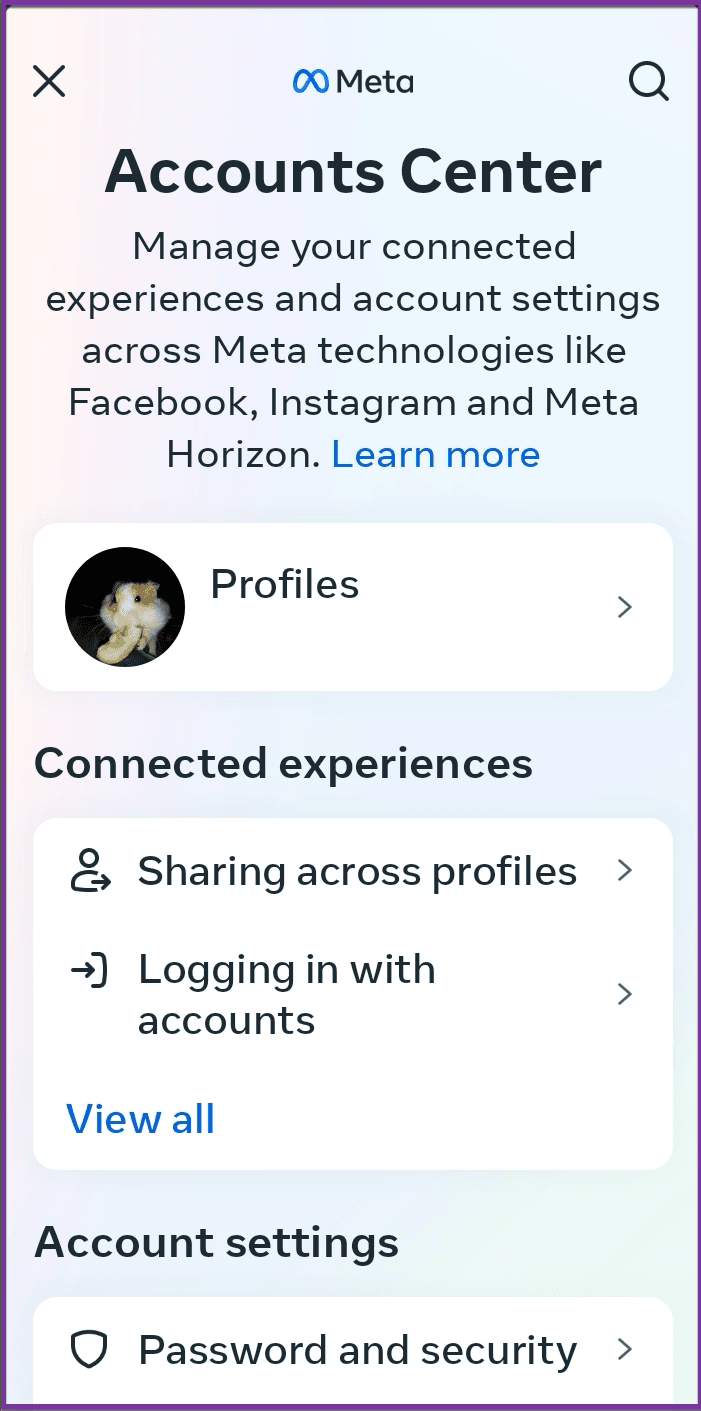
- If you're using a computer, click on your profile picture at the top right and then select Profile.
Step 3: Open Settings
- Mobile: Tap the three horizontal lines (hamburger menu) in the top right corner and select Settings and Privacy.
- Desktop: Click on the gear icon (Settings) next to Edit Profile.
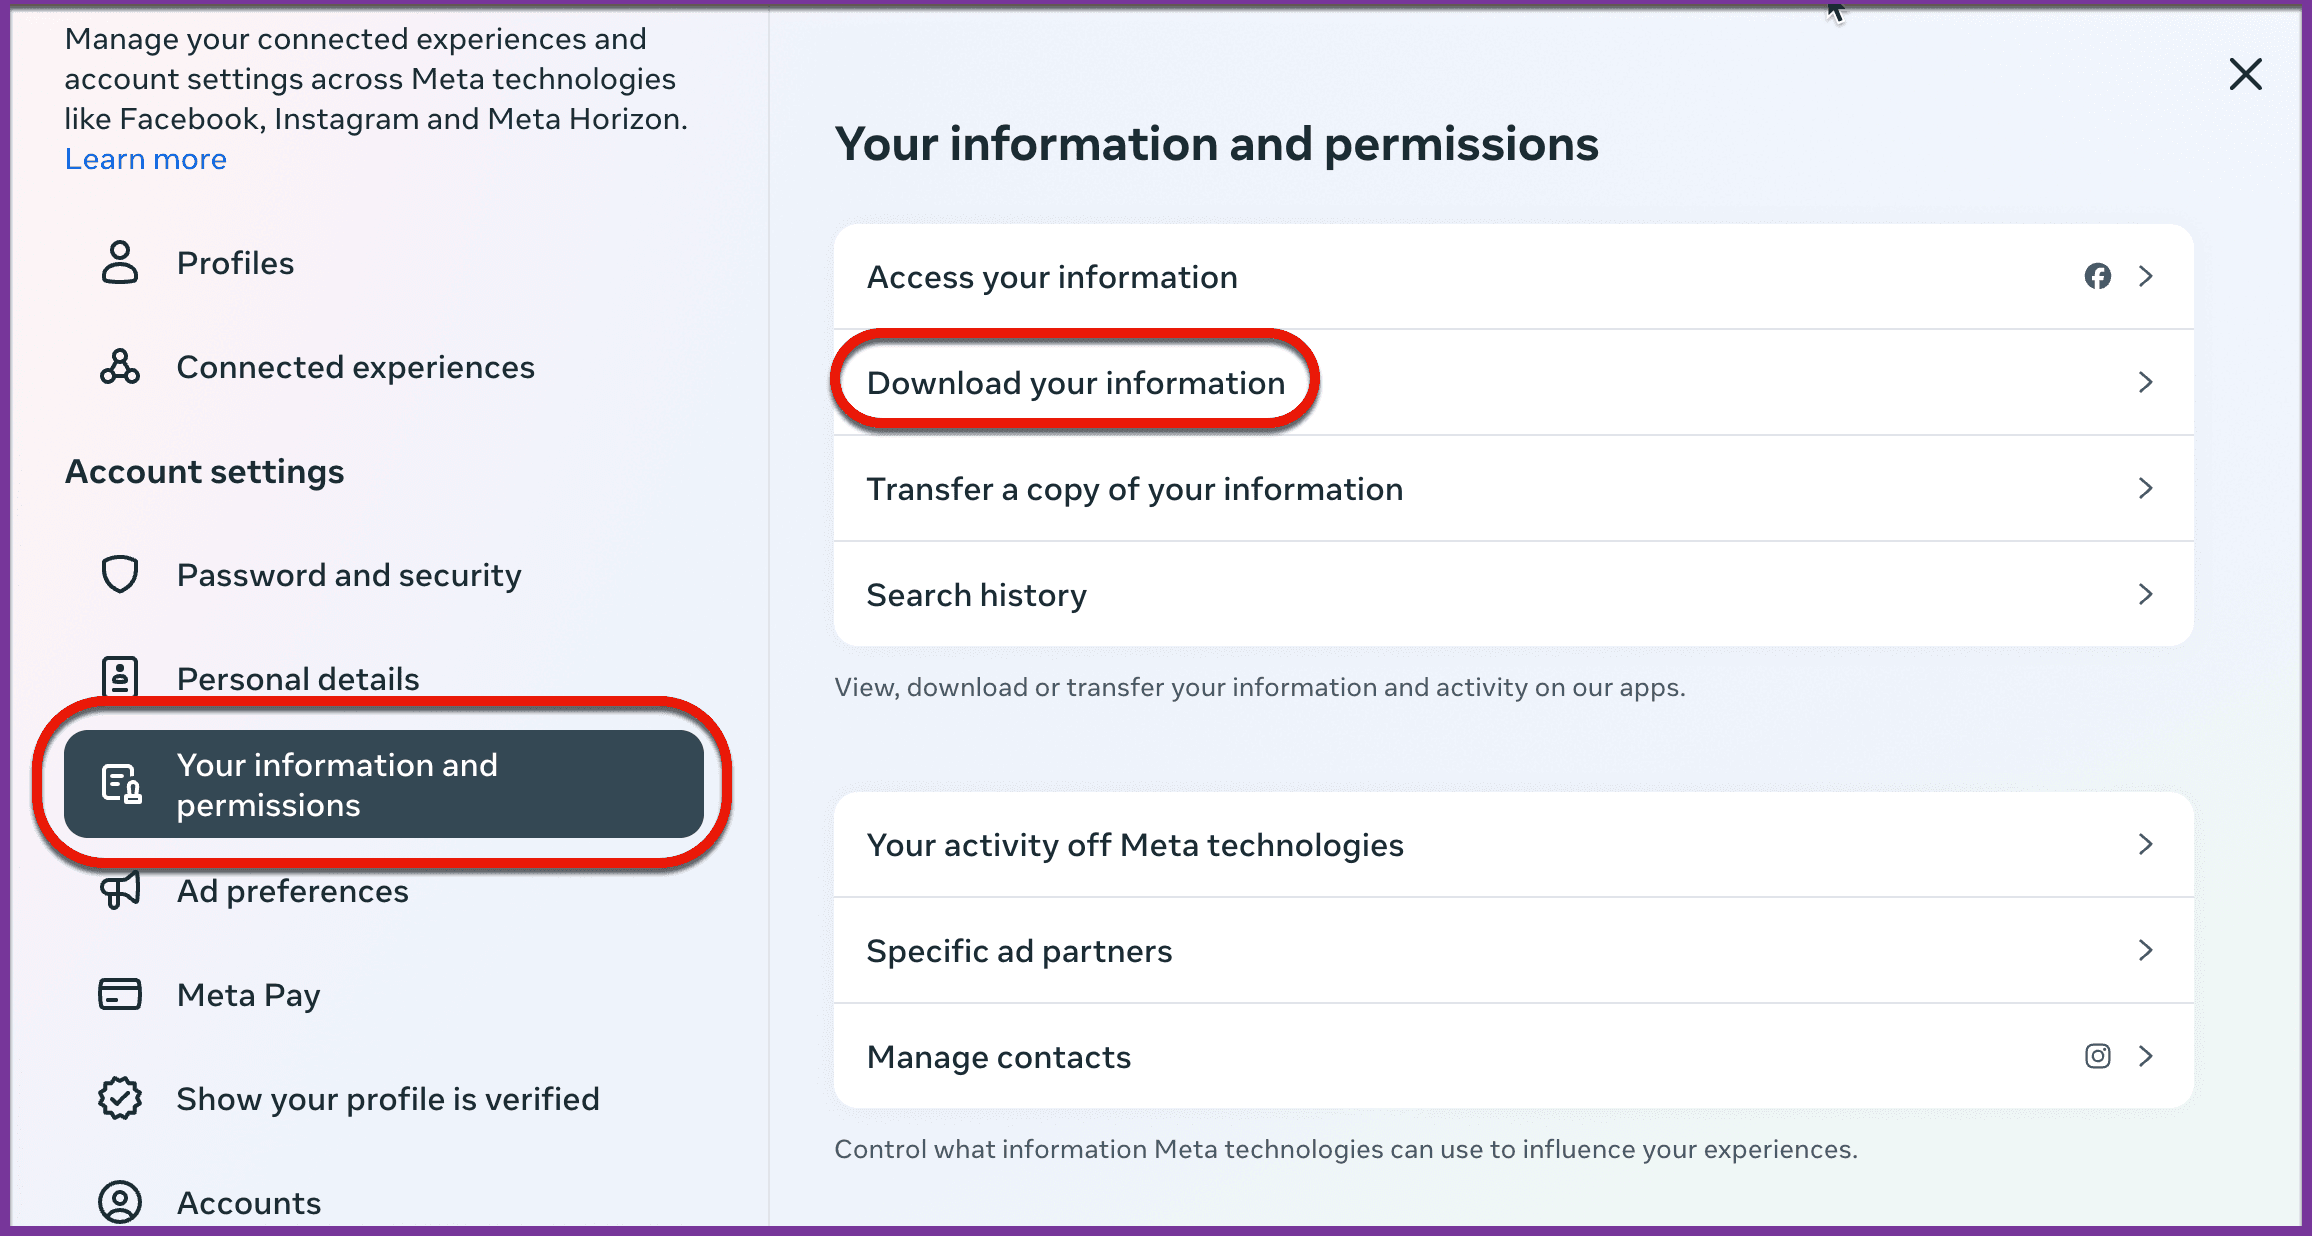
Step 4: Go to “Your Information and Permissions”
- In Settings and Privacy (Laptop/Desktop) or Accounts Center (Mobile Device), scroll down to find Your Information and Permissions.
- Select Download Your Information.
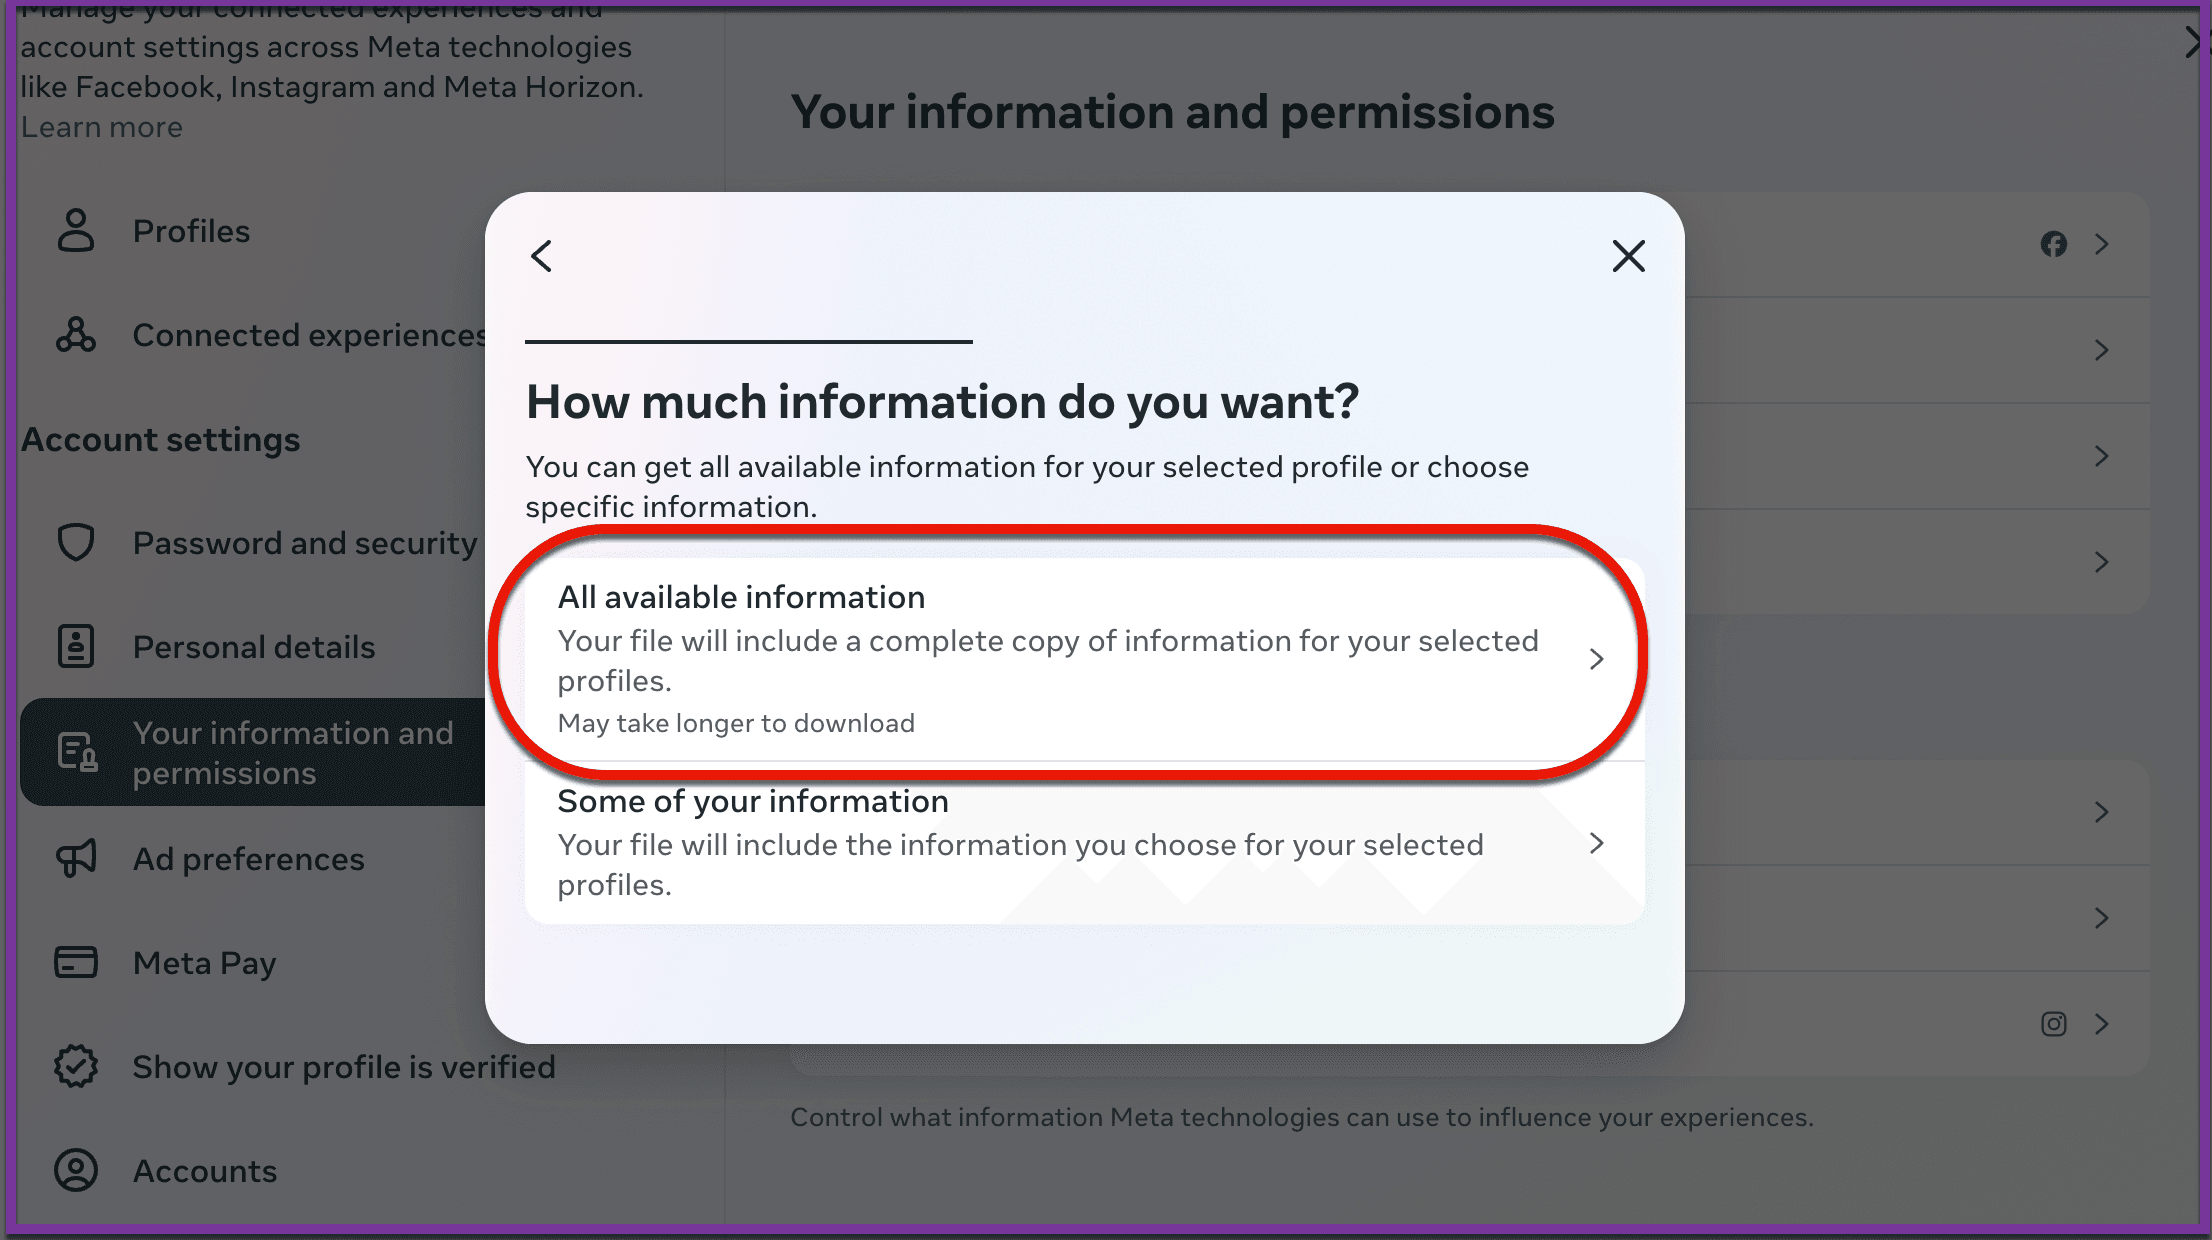
- Instagram will ask you how much information you want to download.
- Select All Available Information.
- Select Download to Device.
- Click on Create Files.

Step 5: Select the File Format
- Click on Format.
- Select JSON.
- Click on Media Quality.
- Select Low.
- Click on Save.
Step 5: Check Your Email
- Instagram will send a notification to the registered email within a few hours (it may take up to 48 hours if you have a lot of data).
Important Notes
- The link is only valid for four days, so be sure to download it within that timeframe.
- The data package may include photos, comments, profile details, messages, and more. It’s a great way to back up your account or review your history on Instagram.
Should you have any questions or suggestions, please get in touch with the Datacy Customer Support Team by sending an email to [email protected].
Other Guides
📄 How to Download your ChatGPT data
📄 Troubleshooting Datacy Extension Issues
📄 How to Download your data from Gemini
📄 How to Generate your Referral Link
📄 How to Monetize your Web Browsing
📄 How Much will I Earn using Datacy
📄 Getting Matched with Other Opportunities
📄 How to Request your Data from Instagram
📄 Datacy’s Frequently Asked Questions (FAQ)
📄 Download and Sign-Up for Datacy
📄 What are the Key Features of Datacy
📄 Can I Use Datacy on my Phone
📄 What is Datacy
📄 Your Data Privacy is Our Top Priority
📄 How to Connect your Social Media Apps
📄 Tips: Earning More Rewards Browsing with Datacy
📄 Which Browsers Support Datacy
📄 Understanding the Earnings Page on the Datacy Dashboard
📄 Getting Started
📄 Verifying your PayPal Account
📄 Payment Methods for Datacy
📄 How to Use the Earnings Tab
📄 What Happens to my Collected Data
📄 Tips: Get Matched with Brand Communities on Datacy
📄 Generate your Referral code on the Datacy Dashboard
📄 How to Manage your Data Preferences
📄 How to Make Data Deletion Requests
📄 How To Request your Data from Tiktok
📄 3 Tips to Maximize your Earnings with Datacy
📄 How to Earn and Benefit from your Data with Datacy!
📄 Setting up a Datacy Account
📄 Seamlessly Connect Your PayPal to the Datacy Extension
📄 How do I Cash Out Datacy Payments
📄 What Countries are Supported by Datacy
📄 Surf to Datacy FAQ
📄 How do I Earn with Datacy
📄 How to Connect Reddit, X, and Youtube to Datacy
📄 Key Features of Datacy
📄 How to Restrict Websites from your Datacy Dashboard
📄 Connect Datacy with Stripe
⬅️ Back to Knowledge Base